Ok, I'll admit something... sometimes I pick items up at thrift stores and I have NO clue what I'm going to do with them. Really random things I don't have a purpose for and I don't know why but I KNOW I need it. Sometimes these thrift store finds end up sitting in my basement for a little while, until I finally realize the perfect use for them. Like this vintage tripod. I bought it at the Salvation Army and really didn't know why I wanted it. There was just something about the look of it that felt like my style. I got it home and then realized it was destined to be a floor lamp!
With a tiny bit of work it became this!
Here's the problem, I have a few things sitting in the basement and I still need a little inspiration. I suppose some of them could just be quirky home decor items that haven't found the right place yet, but really, most of these need a little creativity. Things like these:
Vintage fabric from Hawaii...
A Bull Horn...
4 Green, Vintage Metal Drawers...
Yep, that's some pretty random stuff, huh? Do you have any thrift store finds that you didn't quite know what to do with? Do you hang on to them until inspiration strikes, too?
Wednesday, April 10, 2013
Friday, April 5, 2013
Candlestick Cupcake Stand Tutorial
I love this project because it uses two things I see all the time a thrift stores: two glass plates and a brass candlestick. This even works with an over embellished and sad looking candlestick like this one! I mean seriously, the poor thing is a few plastic crystals short of a set...
Brass candlesticks work so well to make a cupcake stand because they have a secret to them, something you may not realize... Most brass candlestick holders do this:
They come apart! How awesome is that?! I don't think most people would know that these things are screwed together in a few places. It makes removing that beaded silliness easier. Basically, for this project all I had to do was drill holes in the glass plates and then reassemble it. Score! I love simple DIY jobs that don't look like they were simple to do.
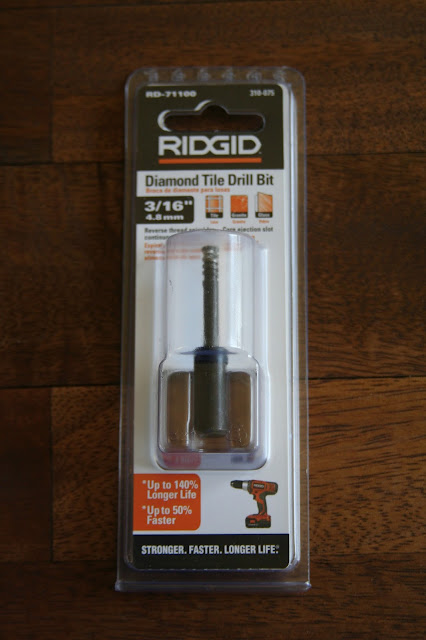
This project was my first attempt at drilling through glass. If the idea of drilling a hole in a glass plate sounds a little scary, don't worry, it's not hard at all! I had to purchase a special drill bit that is specifically made for glass and ceramic. They aren't cheap but it's worth it to have the right tools for the job.
While using this drill bit, I had to keep the surface of the glass wet, so I would drill for a little bit and then add some water, drill for a little bit and then add some water. You get it. I begin drilling the hole, holding the drill at a 45 degree angle until it began to cut a groove in the glass. Then, I slowly moved the drill into a 90 degree angle (straight up and down) until I was all the way through the glass. Making sure to add water as I was drilling.
The trickiest part for me was because I bought a drill bit that was a tad too small. I spent too much time trying to make the hole wider with the drill bit so that it would fit on the screws in the candlestick. It eventually worked, but it would have been much easier to have just purchased the correct size in the first place...
To cushion the glass between the metal, I picked up these Neoprene Rubber Washers from Home Depot. This will keep the glass from chipping or cracking against the metal candlestick where they are screwed together. After all that work I would hate to assemble it and crack the glass! I had to trim down the washers so that it doesn't show in the assembled cupcake stand. For the top piece of glass I actually had to take a razor blade and cut a washer in half so it was less thick and could be reassembled. Ya gotta do what ya gotta do.
Here are a few assembly shots:
Subscribe to:
Comments (Atom)


